
Hi there! I’m excited to share my favorite new t-shirt with you today. Actually, it’s one of my 5 favorite new t-shirts, but I’m getting ahead of myself.
I am a knit-top-and-jeans girl. Well, quickly we’re moving into knit-top-and-shorts weather here, but you get my point. Like so much of the world, this is my daily uniform. It’s the comfort, easy fit, wash-and-wearability that’s important to me.
For a while now, I’ve had TNT (tried-and-true) patterns for a variety of styles in the knit top category – tank, raglan, cut-on sleeve (duh), and more – but a well-fitting, classic set in sleeve t-shirt pattern has eluded me. There are a variety of patterns I’ve been meaning to tweak/hack into this, but time and not enough of it and yada yada.
And then the Austin Tee came into my life.
Melissa released this pattern last week, but I’ve been working with her on testing it for a couple of months. When it came time to try on my version of the last test, I looked in the mirror and I felt like the clouds parted. (Too much? Not if you’ve tried as many ill-fitting sewing patterns as I have!) Look at this shoulder and armscye fit…
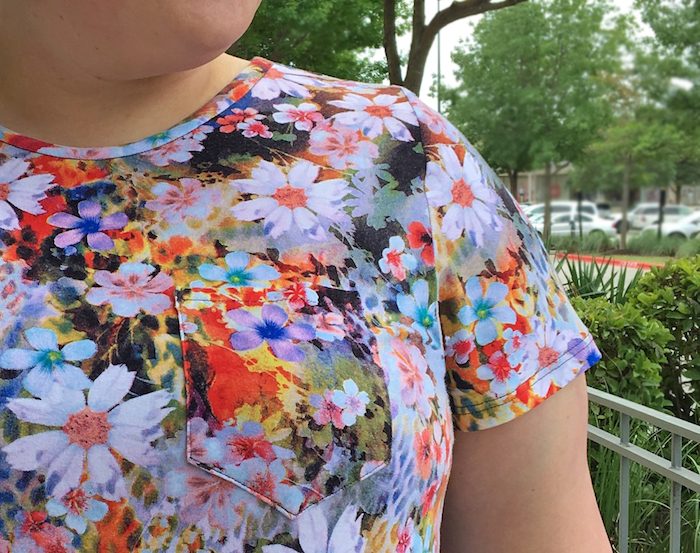
Those of you curvy ladies reading this know how hard this is to find. The top patterns in larger sizes are so frequently too wide in the shoulders that it’s almost comical. The only change I made to the pattern from a fit perspective was to blend from a 2X to a 3X at the side seams for my hip measurement. Whaaat. Yep. That’s it.
The fabric is a light-to-medium weight rayon/lycra that I bought at High Fashion Fabrics in Houston. They do have some fabrics online, but I don’t see their knits, even though they do have quite a few in-store. It’s a Telio Dakota jersey if that helps, and I do recommend it. Like most rayon knits with stretch for days, it wasn’t the easiest to work with, but it’s a nice weight, has good recovery, and feels amazing to wear.
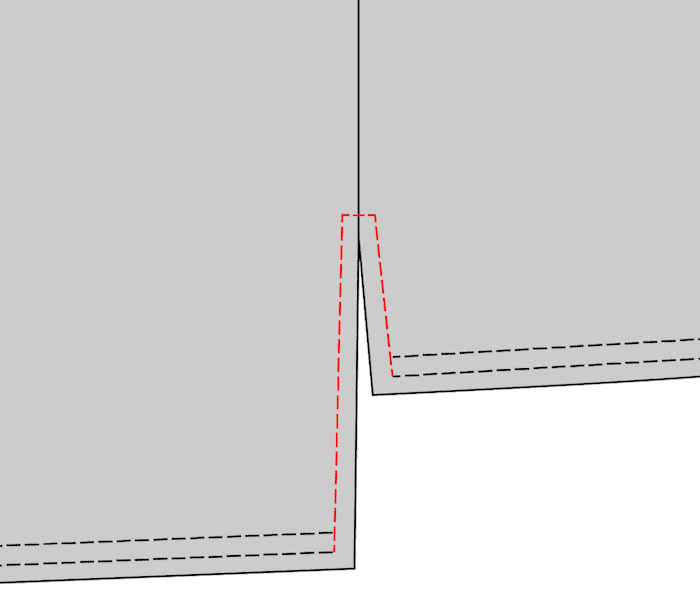
My hack was a simple one. I made a split hem. I’ve sewn a couple of those lately and they add a little something to the style. All I did was lengthen the back piece 3″ (8 cm), using the technique shown in this post. (Just add length to the bottom for this, no slash and spread.)
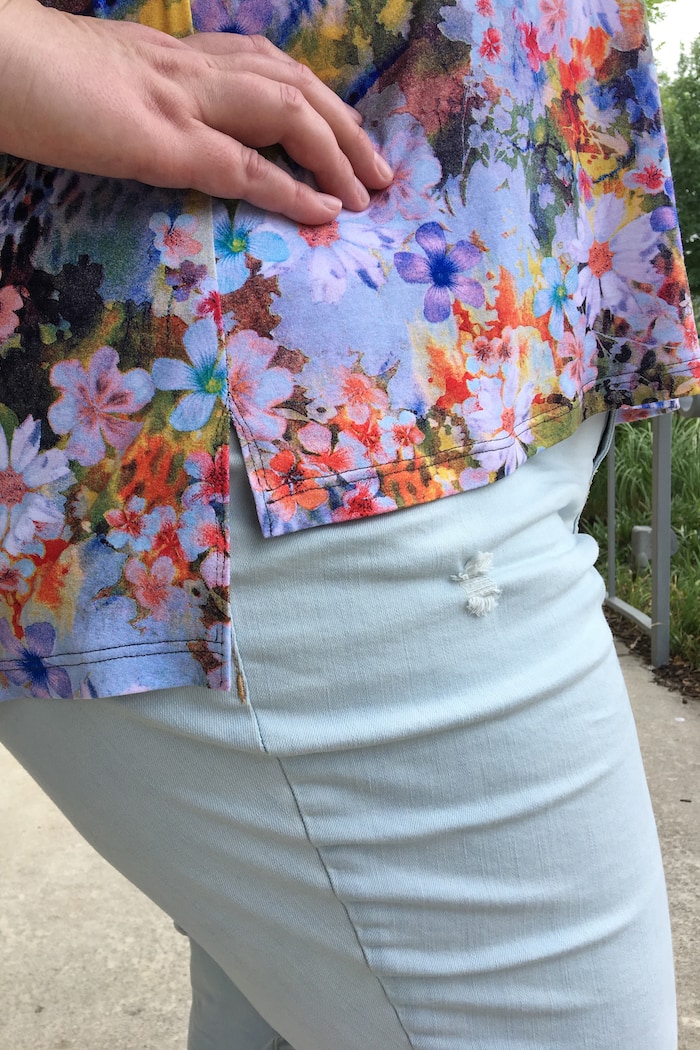
When sewing the side seams, use a stretch stitch on your sewing machine, not your serger. Stop stitching wherever you want the split to reach – mine is about 2.5″ (6 cm) long. Hem the front and back separately, and then press open the side seams. And learn from my mistakes on the stitching around the split. This one is seriously wonky and it was really hard to angle it. I wanted to mirror the twin needle stitching of the hem but I didn’t know how I would pivot it, so I just did a double line of stitching. If you can call it that. The fabric gave me serious trouble here, and I’m going to unpick and restitch it after seeing these photos. Oy!
This little bit of the construction really doesn’t have to stretch, so a straight stitch is fine on the red part I’ve shown below. So this is what my split will look like when I get around to fixing it. Or on my next one. 😉
So yeah, this is one of five versions of Austin that I have so far. Mad love. I’ve made two other “plain” versions and two with the tie front. The next one I have cut out uses mostly the Austin but with the Texana scoop and placket for the neckline. And I really haven’t even started playing with it yet….

Find Susan: Blog, Instagram, Facebook, Pinterest