Welcome to the Tillery Skirt sewalong! Let’s dive right into the process, so we can get those awesomely snappy skirts into our closets as soon as possible. You’ll be glad to have it there!

To begin with, make sure you have your pattern downloaded, printed and assembled. Only use Adobe Reader for printing. (But avoid the Reader that comes pre-installed with Windows, as it often creates problems for pdf patterns.) Be sure to print “actual size” or 100%, and carefully measure your test square. For more printing and assembly tips, visit this post (with video).
(Did you know that you have the option of ordering a large format print of Tillery? Just choose that option in the Format drop-down. You’ll still receive the pattern file and will access the instructions that way.)

Don’t cut out your pattern yet! Let’s talk about getting your skirt pattern just right for your body. Before doing that, take some current and accurate measurements. You’ll need both true waist and hips. It’s common to inaccurately measure both of these! For a video showing how to take measurements on yourself (and for a handy downloadable measurements card), check out this post.

OK, got your waist and hip numbers? Choose your pattern size based on your hip. Don’t worry if your waist isn’t in the same size, we’ll sort that out in a second. When you read the chart, it’s important to keep in mind that the measurements shown are the top of the range for the size. For instance, if your hips measure 46″, you’ll make the size 18.
Let’s say your waist falls into the range for a different size than your hips. No problem. All you’ll do is draw a line between the hip point and top of the skirt pattern pieces to blend between sizes. Do this on all four skirt panels (front, side front, back, and side back). For your waistband, use the size that corresponds to your waist size. See page 4 of the pattern for the illustrations on blending sizes and lengthening/shortening. After any necessary alterations have been made, go ahead and cut out your paper pattern.

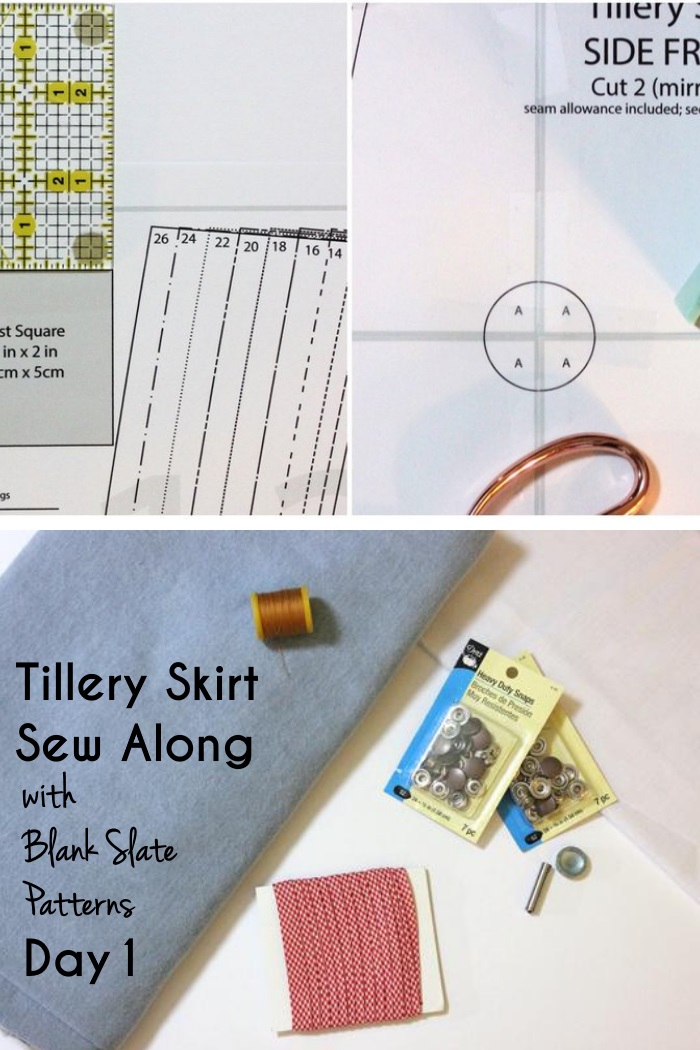
Next, gather all your materials. Be sure to review page 2 of the pattern for the yardage and other requirements. In addition to your fabric, you’ll need:
- Heavy duty snaps (7-12 depending on the length you’re making). After making a load of Tillery Skirts and testing a lot of the snaps that are widely available, we prefer the Dritz brand for their strength and setting reliability. They also come in wide variety of colors. We also prefer these setting tools over the pliers. (both are affiliate links)
- 1/2 to 2/3 yard (.46-.61 m) of fusible interfacing. I’m using Pellon ShapeFlex (SF101). (aff link)
- 1/2″ (12 mm) wide double-fold bias tape (the length of your waist). You can use pre-made or make your own. This will only show on the inside, so you can get as match-y or contrast-y as you like!
- Topstitching thread. This one is optional, but it looks great to show off the flat felled seams and give your skirt a pro touch. Depending on the size of your spool and the length/size of your skirt, you might need two spools.
Let’s talk fabric. Of course, you can make an awesome denim Tillery. It will always have a beloved spot in your wardrobe and it is perfect for a ton of occasions. But there’s no need to limit the pattern to that — just about any non-stretch woven bottomweight could work. Twill, chambray, corduroy, velveteen, pleather, suiting, and more. A solid will show off the seams and snaps well, but a print works great too! And of course, don’t forget to prewash and dry your fabric in the same way you’ll launder the final garment.

Now, go ahead and cut out your skirt pieces, paying close attention to all the grainline indications. There are several markings on the pattern that you’ll want to transfer to your fabric pieces as well — be sure to do this with a washable marker or pin, not by cutting a notch. Notches really interfere with a good flat felled seam finish!
If you are using a fabric that you’d rather not have against your skin at the waist, you can use a different fabric for one of the mirrored waistband pairs. Remember to cut out a pair of waistband pieces from your interfacing. You also need two 1″ wide strips of interfacing that are as long as your skirt at center front. These don’t have to be continuous – they can be pieced together when you fuse them later, if necessary.
All the prep work is done! Tomorrow, we sew flat felled seams and rock the topstitching.
See also:
Tillery Sewalong Day 2: Flat Felled Seams
Tillery Sewalong Day 3: Placket and Hem
Tillery Sewalong Day 4: Waistband and Belt Loops
Tillery Sewalong Day 5: Snaps and Pockets